What is a lay plan?
Updated June 10, 2026 · Fact-checked against vendor pricing pages and primary sources
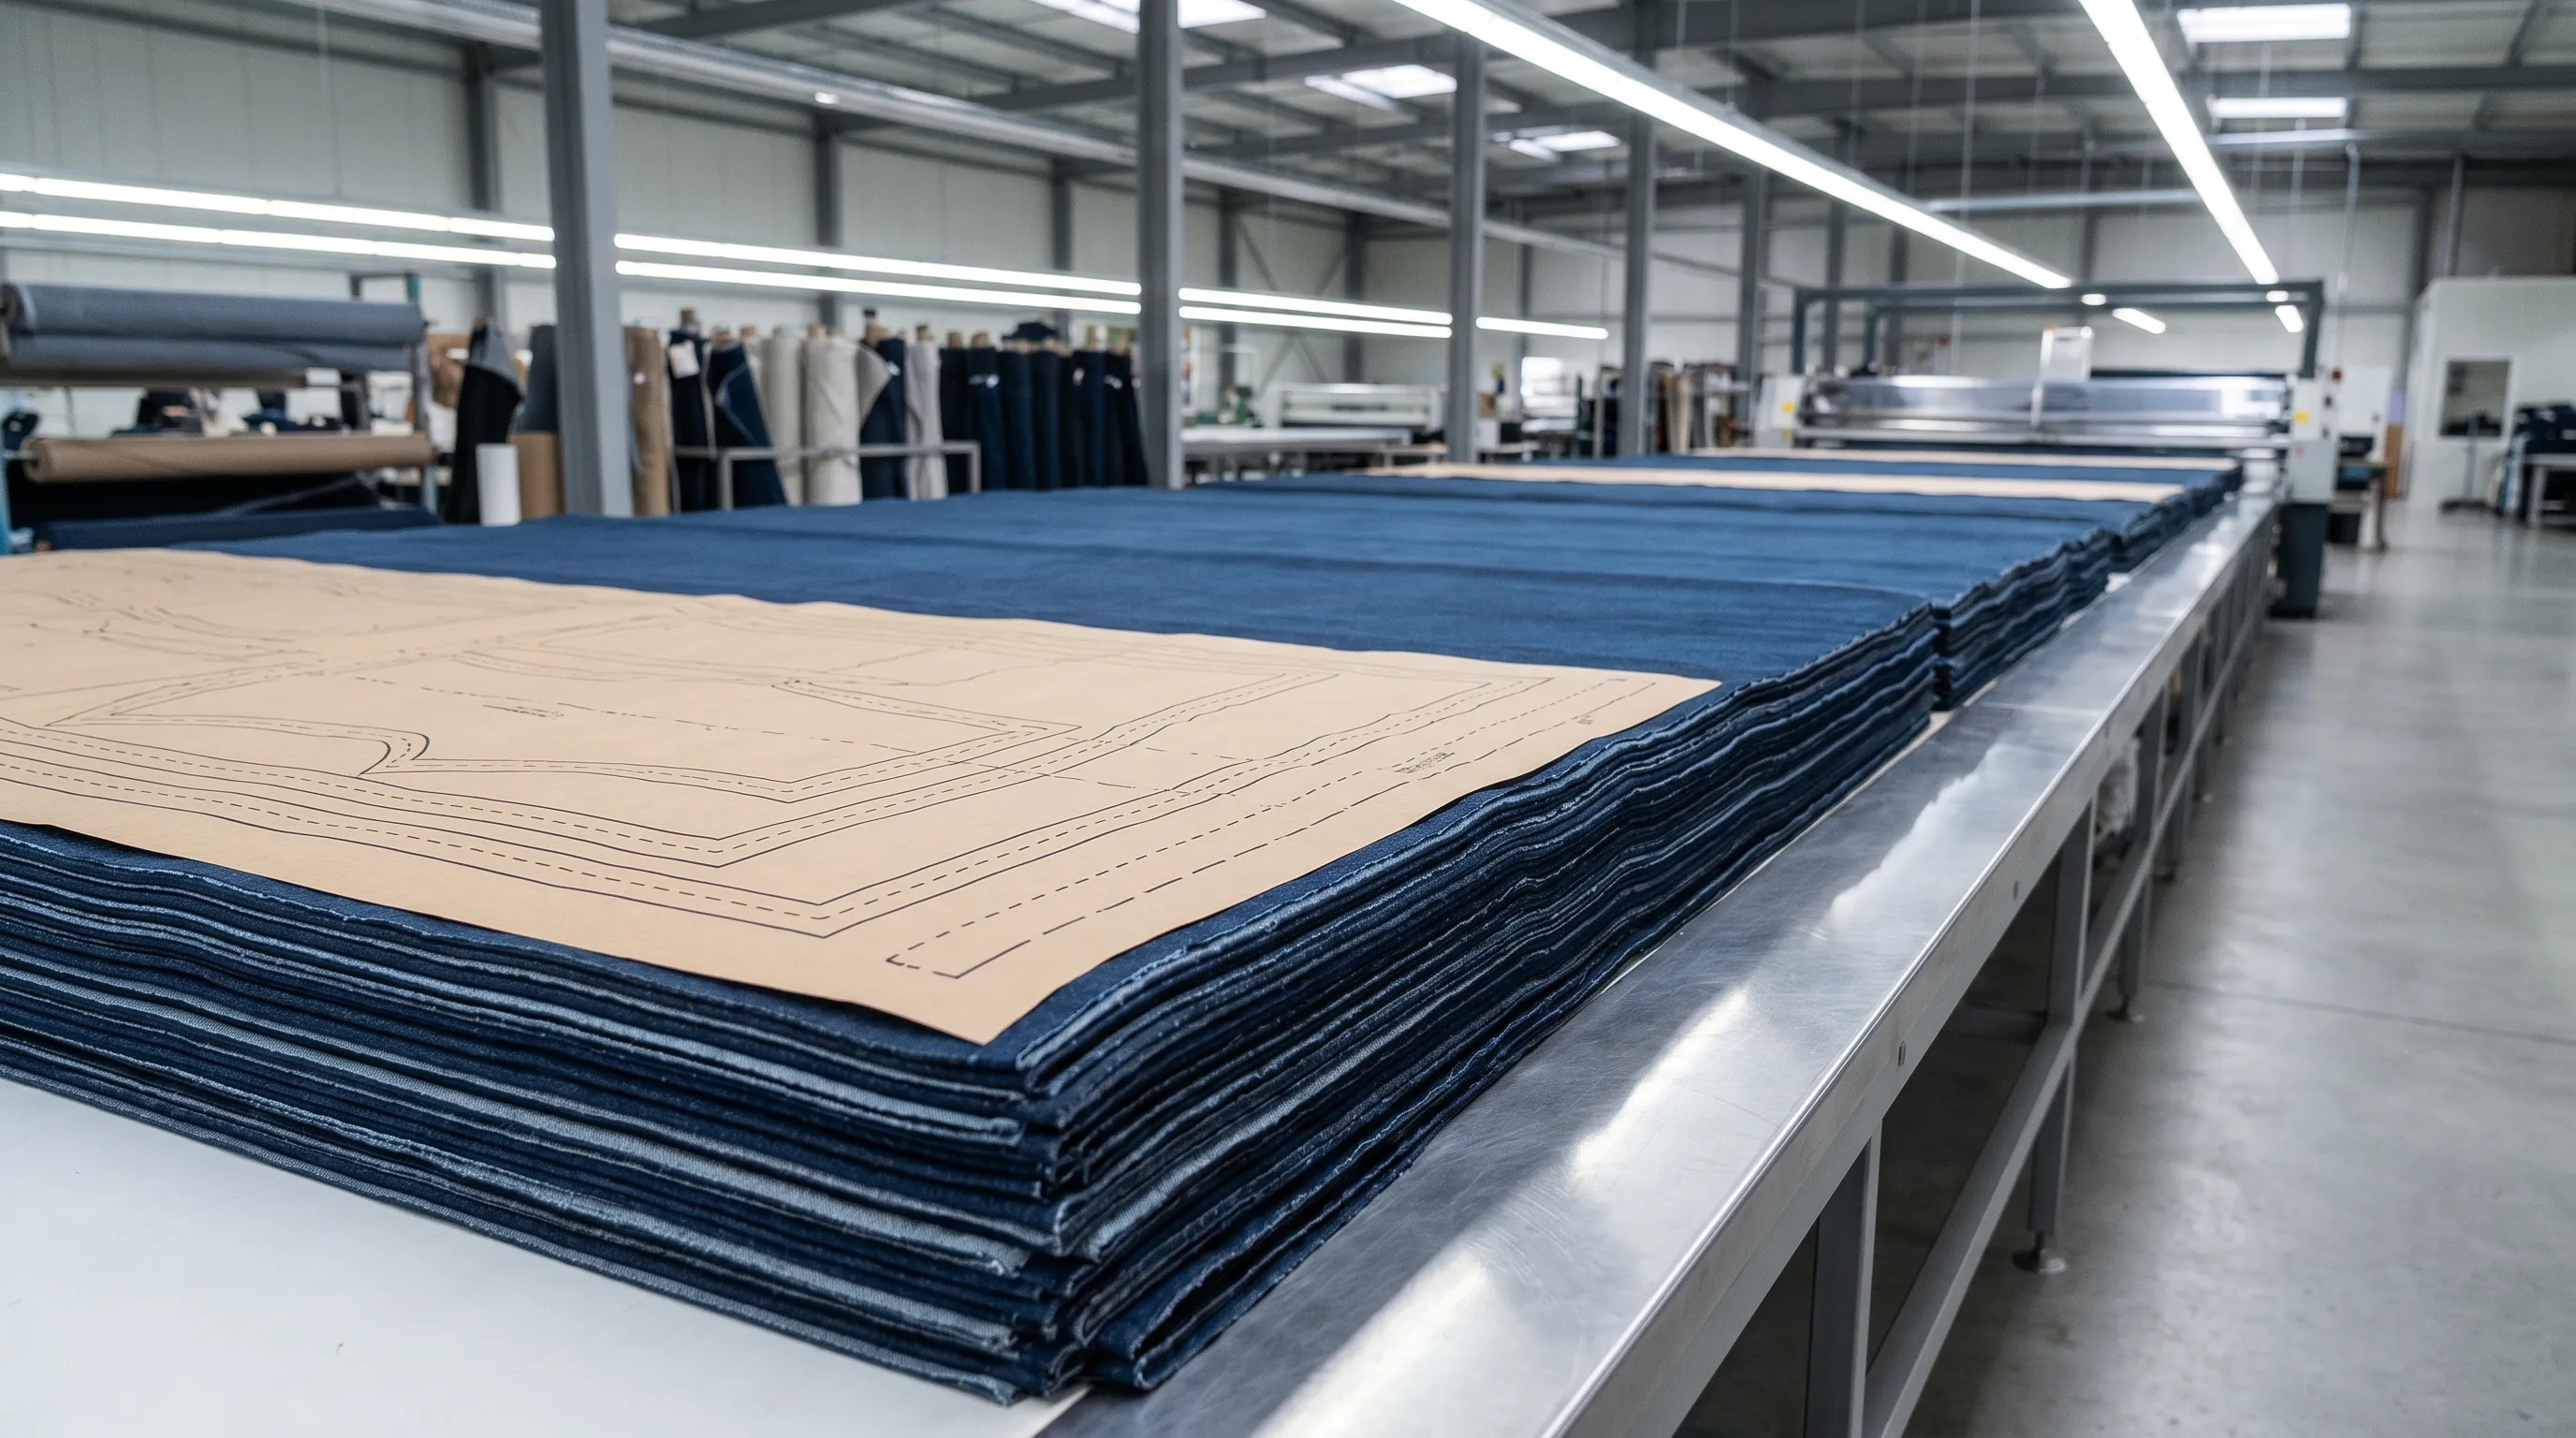
A lay plan is the arrangement of stacked fabric layers (plies) spread on the cutting table beneath a marker, so many identical garment pieces are cut in one pass. It sets how many plies go down, how long each is, and in which direction the face and nap run. A single lay can stack 1 to 300 plies of fabric, and because fabric is 50–80% of a garment's cost, the lay plan is where most cutting-room savings are won or lost.
What is a lay plan?
A lay is a stack of fabric lengths spread flat on the cutting table, one on top of another, ready to be cut as a single block (Online Clothing Study). Each individual layer in that stack is a ply. Lay planning — also called spreading — is the act of deciding and laying those plies down: how many plies, how long each one is, which way the fabric faces, and which marker sits on top.
The payoff is simple. Cutting one ply at a time is slow and wasteful; spreading 80 plies and cutting them in one pass turns one marker into 80 sets of garment pieces. The lay plan is the cutting room's batching strategy — the bridge between the marker that nests the pattern pieces and the cut order that says how many of each size to make.
The key nuance: the lay plan and the marker are two different jobs. The marker decides how tightly the pieces nest across the fabric width (that is marker efficiency). The lay plan decides how the fabric stacks up in height and length, and in which direction — which is what protects the fabric's grain, nap, and pairing so the cut pieces actually sew together correctly.
Plies, lay length, and lay height
Three measurements describe any lay, and all three are planned before a single roll is touched.
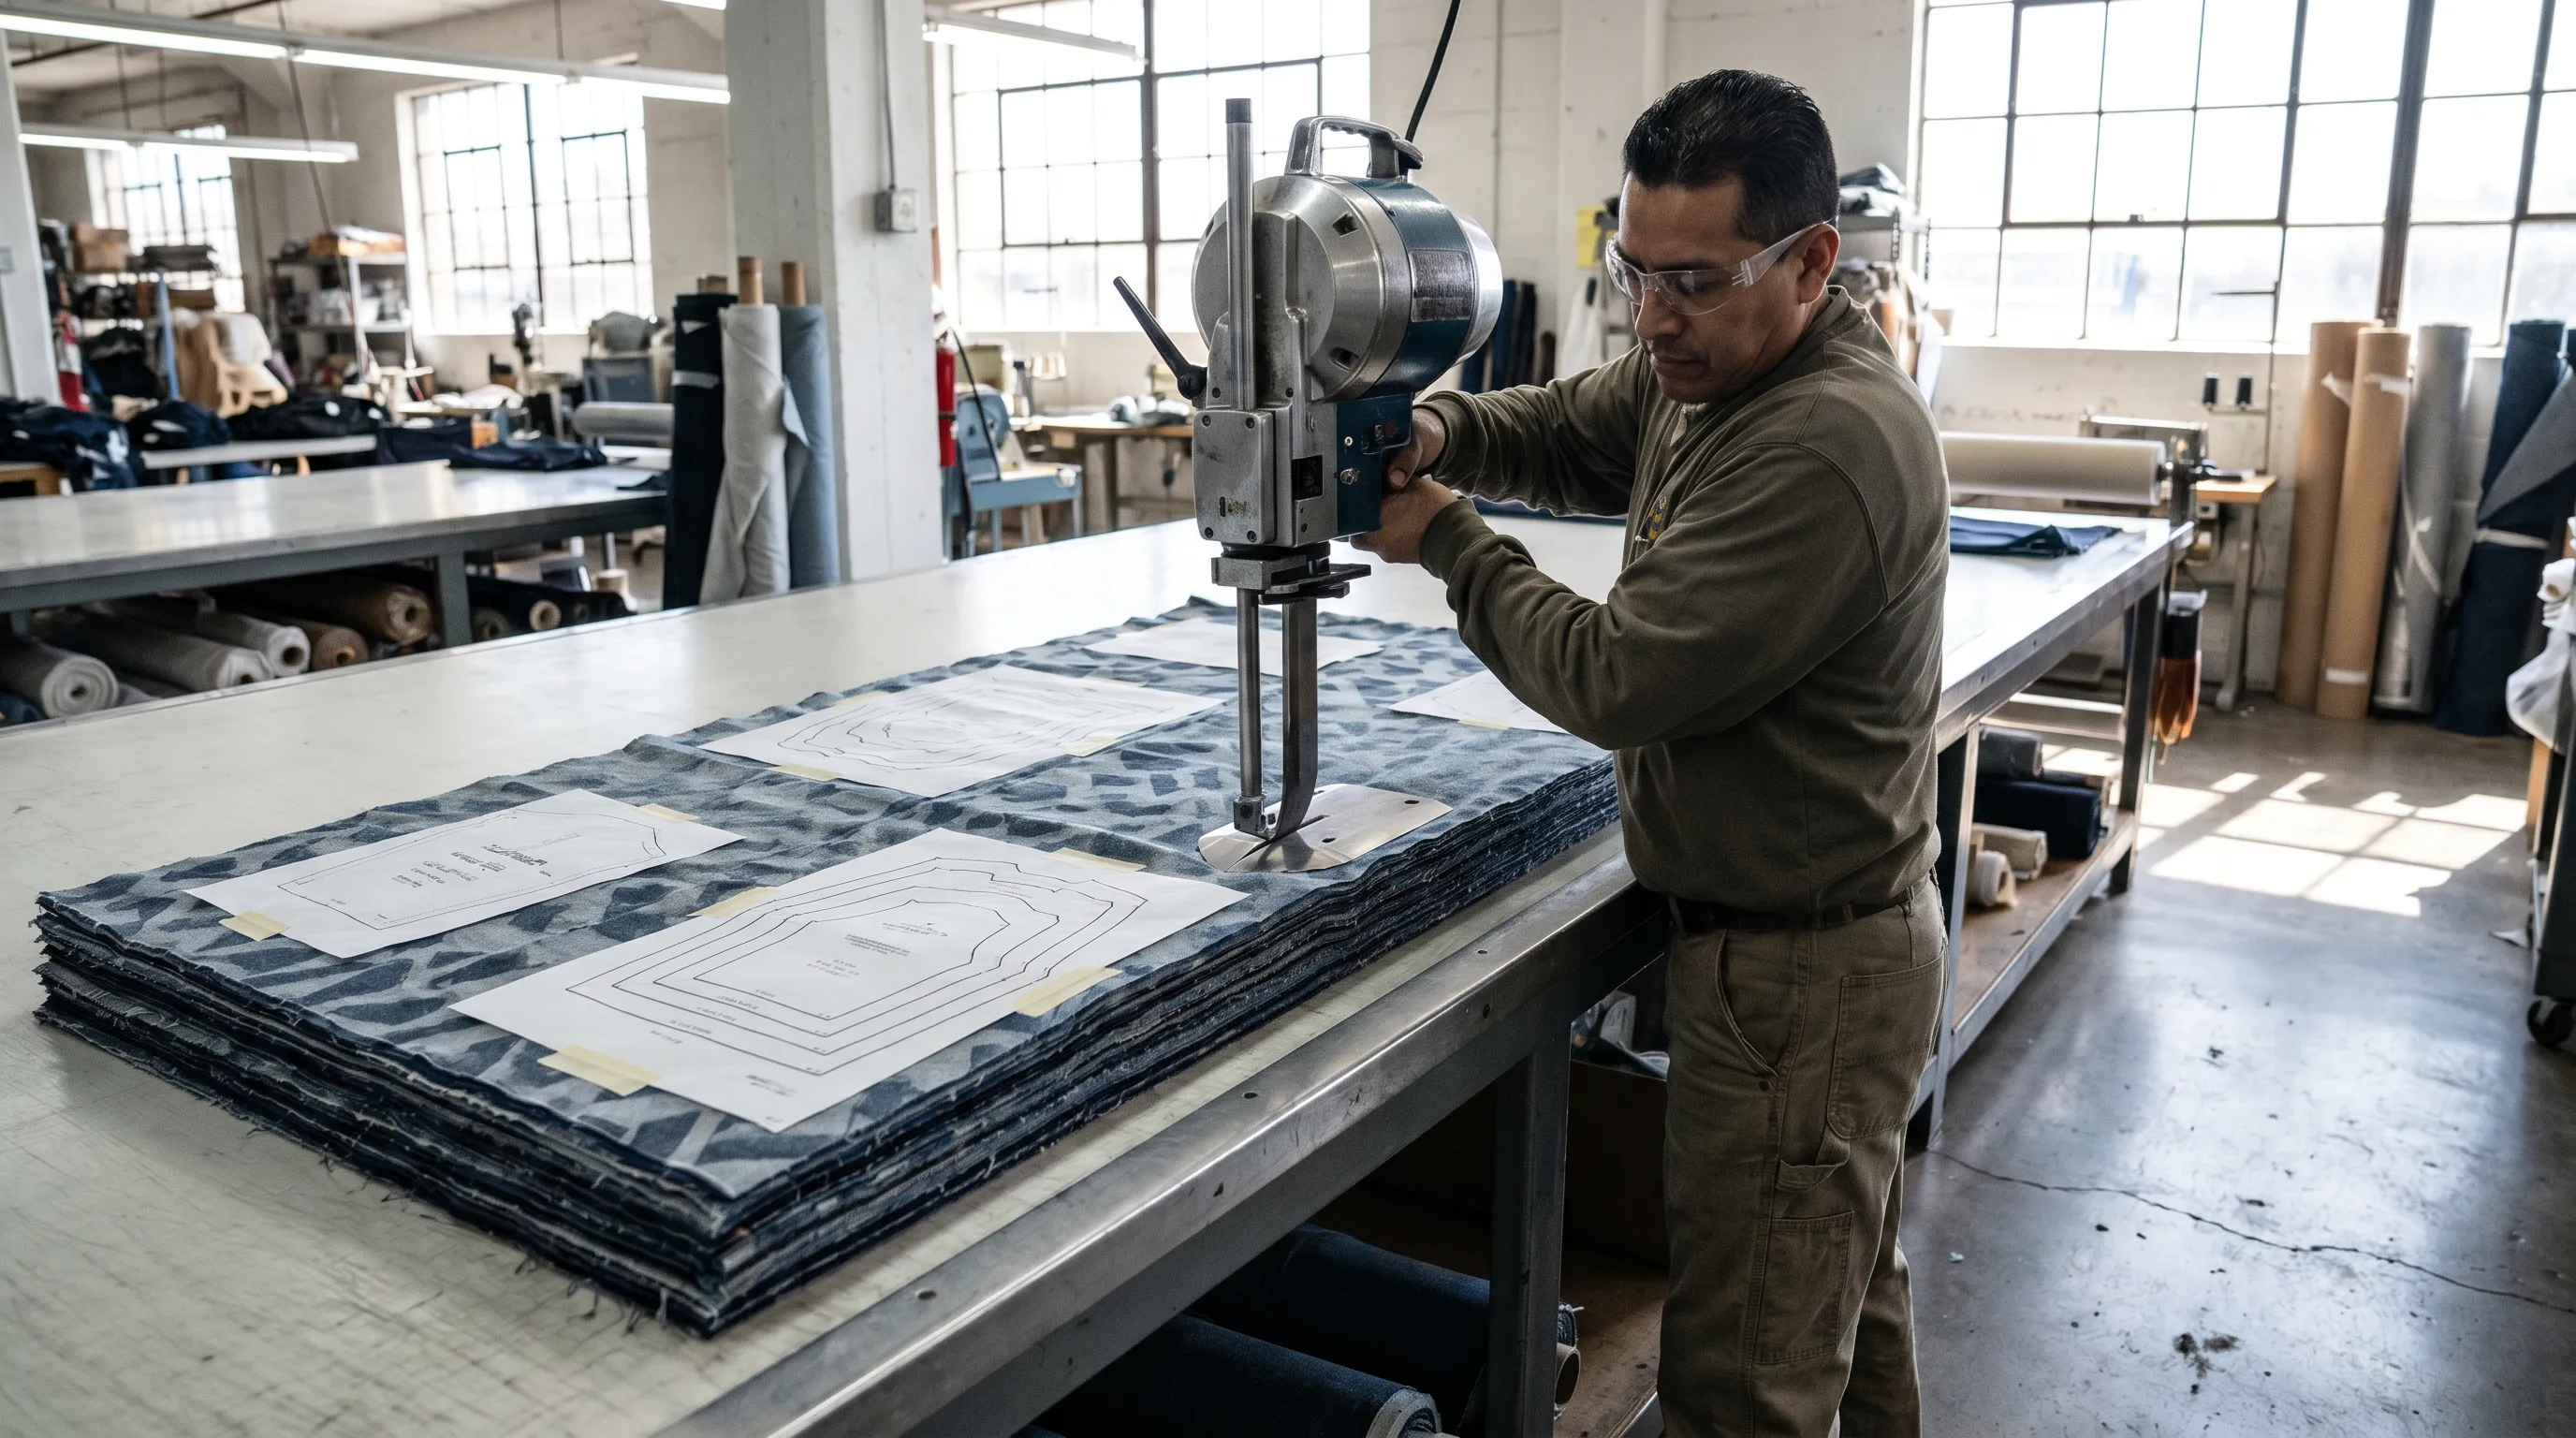
Plies are the number of fabric layers in the stack. The count is driven by the order quantity, the fabric's thickness and behavior, and the reach of the cutting knife — a spread can run anywhere from 1 to 300 plies (Textile Learner). Slippery, bulky, or stretchy fabrics force a lower ply count because the stack distorts; crisp, stable wovens allow taller lays.
Lay length is the length of each ply, and it is planned to match the marker length — the lay is laid out just long enough to carry the marker, plus a small allowance at each end. Lay height is the total thickness of the finished stack, and it is capped by the cutting machine: a straight knife or band knife can only bite through so many plies before the blade deflects and the lower plies cut undersized.
Ply tension is the quiet failure point. Spread too loose and plies form ridges and slack; spread too tight and the fabric relaxes after cutting, so the pieces shrink back smaller than the marker (Apparels Classroom). Either way the cut pieces miss the points of measure and the whole lay can be scrapped.
Worked example
From an order of 600 tees to a 75-ply lay
You have an order for 600 t-shirts in a size ratio of S:M:L:XL = 1:2:2:1. You build one marker that nests all four sizes once — six pieces per size across the fabric width — so each ply yields one full set of all four sizes in that ratio. To make 600 units at that ratio you need 100 sets, but the knife can safely cut 75 plies of this jersey. So you plan two lays: one of 75 plies and one of 25 plies, each carrying the same four-size marker. Marker length is 7.2 m, so each ply is spread to roughly 7.3 m (marker + end allowance). Result: two spreads totalling 100 plies, cut in two passes instead of 600, with the size ratio baked into the marker so every ply comes off balanced.
Spreading modes: which way the fabric faces
A spreading mode is the manner in which plies are laid down, chosen by the fabric's directionality and the equipment available (Textile Trendz). It is the single most failure-prone decision in lay planning, because a mode that ignores nap or grain produces garments with mismatched shading between panels.
Face-to-face (F/F): plies are paired face against face. The roll is cut and turned at the end of each ply, so napped fabric runs the same way on facing plies — useful for directional cloth and for pairing left/right garment parts.
Face-one-way (F/O/W): every ply faces the same direction. Slower and costlier because the fabric is cut and the end repositioned at each ply, but it spreads prints and pile (corduroy, velvet) correctly. Face-up lets the operator watch for flaws; pile is often spread face-down.
Nap-one-way (N/O/W) vs nap-up-and-down (N/U/D): symmetric, non-directional fabric can run nap both ways (N/U/D), the fastest mode. Asymmetric or directional fabric must run nap-one-way — the most time-consuming to lay up, but it produces the best quality and prevents shade banding.
The four spreading modes at a glance
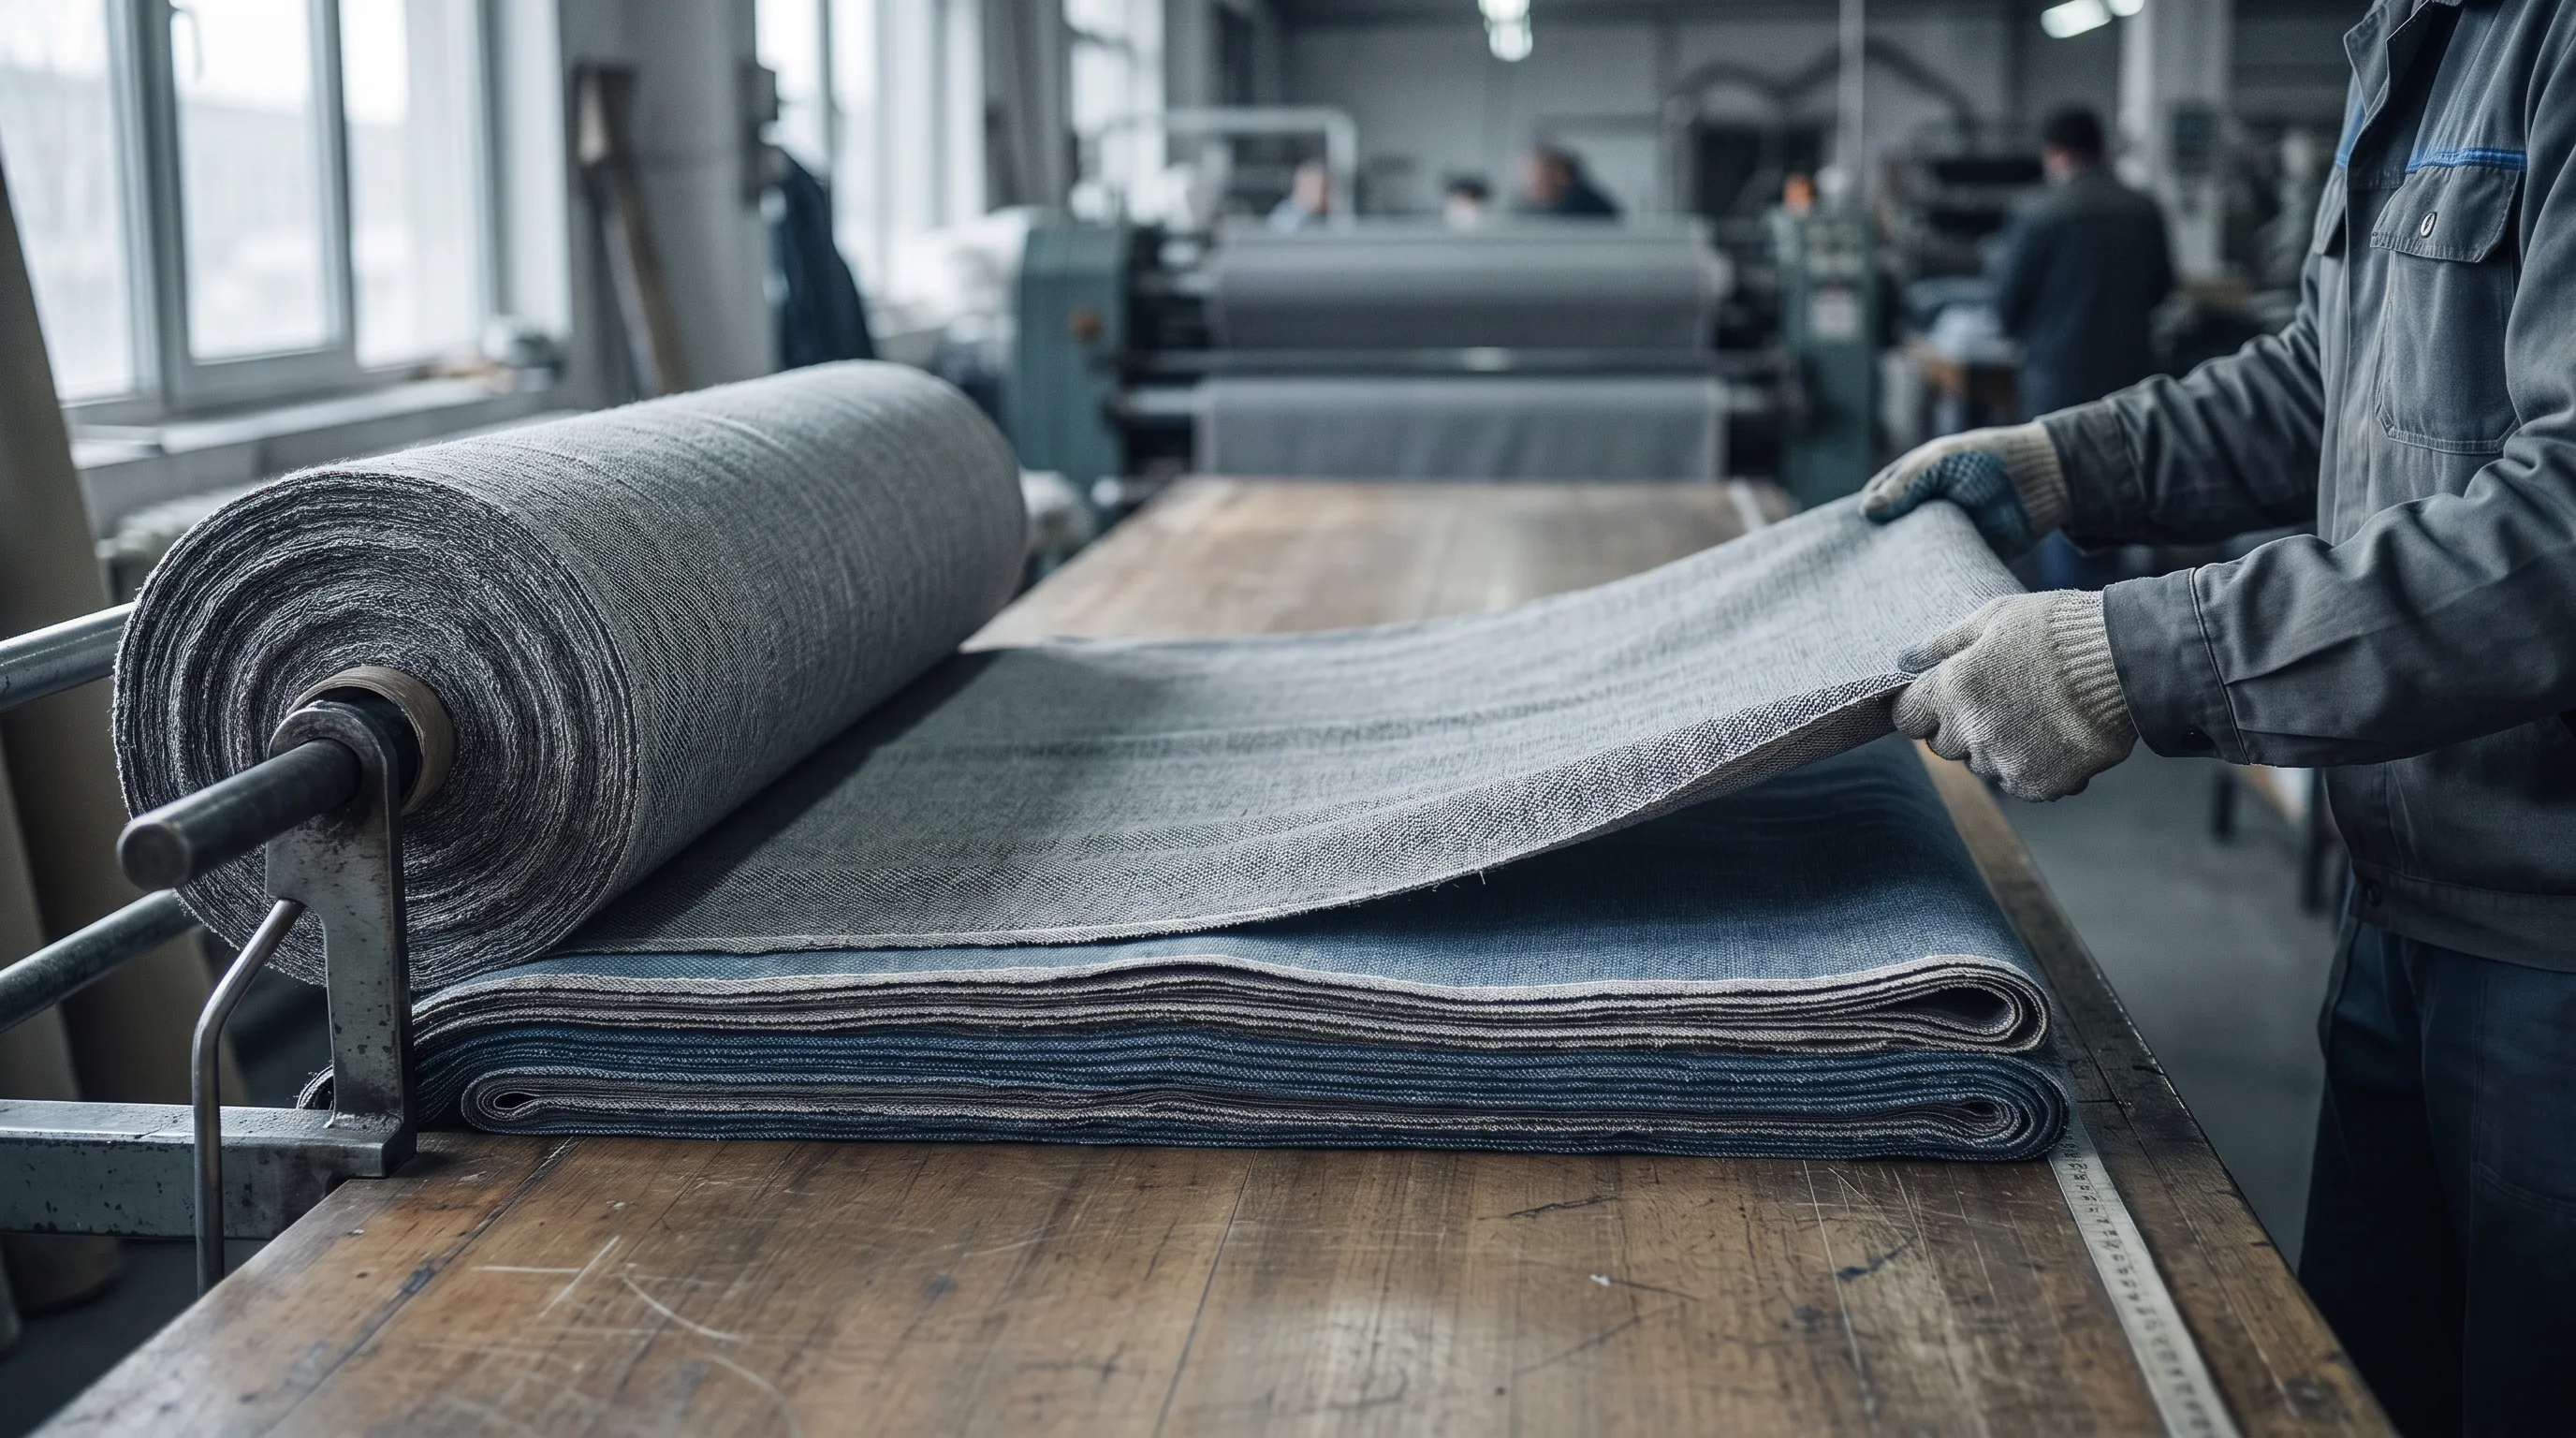
Manual vs automatic spreading
How the lay actually gets built — by hand or by machine — sets the practical ceiling on ply count, speed, and tension control.
| Spreading method | Typical speed / capacity | Best for |
|---|---|---|
| Manual spreading | Operator-paced; slower, low productivity | Small firms, short runs, sampling lays |
| Automatic spreader | Up to 100–150 yd/min, high productivity | Large orders, tall lays, even tension |
| Flat (straight) lay | All plies the same length | Standard production; simplest to plan |
| Stepped lay | Plies built up in steps of equal length | Mixed size ratios within one spread |
Speed and capacity figures per Apparels Classroom and Textile Engineering; flat vs stepped construction per Textile Engineering.
How the cut order plan and marker drive the lay
A lay never starts with the fabric — it starts with the cut order plan. The cut order plan converts the customer's size ratio (how many S, M, L, XL the order needs) into a set of markers and lay heights: which sizes share a marker, how many plies each lay carries, and how the leftover sizes get a second, shorter lay or a stepped construction (Apparel Resources). Get the cut order plan wrong and you over-cut some sizes and short-cut others — overproduction the brand pays for in dead stock.
On top of the lay sits the marker, and marker efficiency is where the money is. Marker efficiency is the ratio of pattern area to total marker area; the higher it is, the less fabric is wasted (Textile Engineering). Because fabric is 50–80% of a garment's cost, even a 2% improvement in utilization is material to margin — and computerized marker planning has been shown to deliver up to 23% better fabric utilization than manual marking (Top Notch Pattern).
The lay plan ties these together: a tight marker laid as a tall, evenly-tensioned, correct-mode lay is the difference between a costing that holds and one that bleeds. This is downstream of design, but it is set in motion the moment a tech pack and approved sample reach the factory.
What a lay plan is NOT — common mistakes
Confusing the lay plan with the marker. The marker nests pieces across the width; the lay plan stacks plies in height and length and sets the spreading mode. A perfect marker spread in the wrong mode still yields shade-banded, mismatched garments.
Treating ply count as 'higher is faster.' Lay height is capped by the knife and the fabric. Push past the safe height and the lower plies cut undersized as the blade deflects — a defect that only shows up after the lay is already cut.
Ignoring fabric direction. Running directional cloth, nap, or pile in a fast non-directional mode is the classic costly error: the panels of one garment come out of different facing plies and shade-band visibly down the seam.
Letting tension drift. Loose plies ridge; tight plies relax and shrink after cutting. Both throw the cut pieces off the grade rule and off-spec.
Skipping the cut order plan. Spreading straight from a size ratio without a plan over-cuts popular sizes and short-cuts the tails — overproduction the brand eats. A clean, factory-ready spec stops the guesswork upstream: Adstronaut's tech pack generator produces the BOM and graded measurements the cutting room needs to plan the lay correctly.
Frequently asked questions
What is a lay plan in garment manufacturing?
A lay plan is the arrangement of stacked fabric layers, called plies, spread on the cutting table beneath a marker so that many identical garment pieces are cut in one pass. It sets how many plies are laid, how long each ply is, and which direction the fabric face and nap run.
What is the difference between a lay and a marker?
The marker is the layout of pattern pieces nested across the fabric width to minimize waste. The lay is the stack of fabric plies spread under that marker. The marker controls width efficiency; the lay controls how the fabric stacks in height and length and which way it faces.
What is a ply in fabric spreading?
A ply is a single layer of fabric in the lay. Stacking many plies lets one cut produce many identical pieces. A spread can range from 1 to 300 plies, with the count limited by order size, fabric thickness and behavior, and how many layers the cutting knife can cleanly cut.
What is lay length and lay height?
Lay length is the length of each ply, planned to match the marker length plus a small end allowance. Lay height is the total thickness of the finished stack of plies, capped by the cutting machine — beyond a safe height the blade deflects and the lower plies cut undersized.
What are the main fabric spreading modes?
Face-to-face (plies paired face against face, pairs left/right parts), face-one-way (every ply faces the same way, for prints and pile), nap-up-and-down (non-directional fabric, fastest), and nap-one-way (directional fabric, slowest but best quality and no shade banding).
What is the difference between a flat lay and a stepped lay?
In a flat or straight lay every ply is the same length, the full length of the marker. In a stepped lay plies are built up in steps, with all plies in one step the same length — used to match mixed size ratios within a single spread. The composition of each spread comes from the cut order plan.
How does the cut order plan relate to the lay plan?
The cut order plan converts the order's size ratio into markers and lay heights — which sizes share a marker, how many plies each lay carries, and how leftover quantities get a second or stepped lay. The lay plan then executes that, so spreading without a cut order plan tends to over-cut some sizes and short-cut others.
Why does the lay plan matter for cost?
Fabric is 50–80% of a garment's cost, so the cutting room is where most material savings are won or lost. A tight marker laid as a tall, evenly tensioned, correct-mode lay protects that fabric; computerized marker planning has been shown to deliver up to 23% better utilization than manual marking.
Is spreading done by hand or by machine?
Both. Manual spreading is operator-paced, slower, and suits small firms and short runs. Automatic spreaders run up to 100–150 yards per minute with high productivity and more consistent tension, which suits large orders and tall lays.
What happens if ply tension is wrong during spreading?
If plies are spread too loose they form ridges and slack; if too tight they relax and contract after cutting, so the pieces come out smaller than the marker. Either error throws the cut pieces off their points of measure and grade rule, and a badly tensioned lay may have to be scrapped.
Hand the cutting room a spec it can lay against
Upload one garment photo and get a factory-ready tech pack — BOM, fabric weights, and graded measurements — so your cutting room can plan markers and lays without chasing missing specs. First pack free, then $3–6.
Try the AI Tech Pack GeneratorRelated reading
Sources and further reading
- Online Clothing Study — what is a lay in the cutting room — definition of lay, lay length tied to marker length, lay height
- Textile Learner — types of fabric lay in spreading — plies range 1–300; straight vs stepped lays
- Textile Trendz — spreading modes — F/F, F/O/W, N/U/D, N/O/W definitions and trade-offs
- Apparels Classroom — spreading methods — manual vs automatic speed; ply tension effects on cut size
- Apparel Resources — fabric utilization & cut order planning — cut order plan converts size ratio into markers and lay heights
- Top Notch Pattern — marker making efficiency — fabric 50–80% of cost; up to 23% better utilization from computerized markers
- Textile Engineering — fabric spreading types & methods — automatic spreading throughput; flat vs stepped spread construction